Project Builds
Every time you upload a project to HubSpot, Palpaca creates a build. The Project Builds panel on the right side of the expanded project view shows a chronological list of all builds, so you can track what was uploaded and whether it succeeded.
Build List
Section titled “Build List”Each entry in the list shows:
- Build number — an incrementing identifier (e.g., #1, #2, #3)
- Status icon — a green check for succeeded builds, a red circle for failed builds
- Relative timestamp — when the build was created (e.g., “5m ago”, “1d ago”)
Click any build to see its full details.
Successful Builds
Section titled “Successful Builds”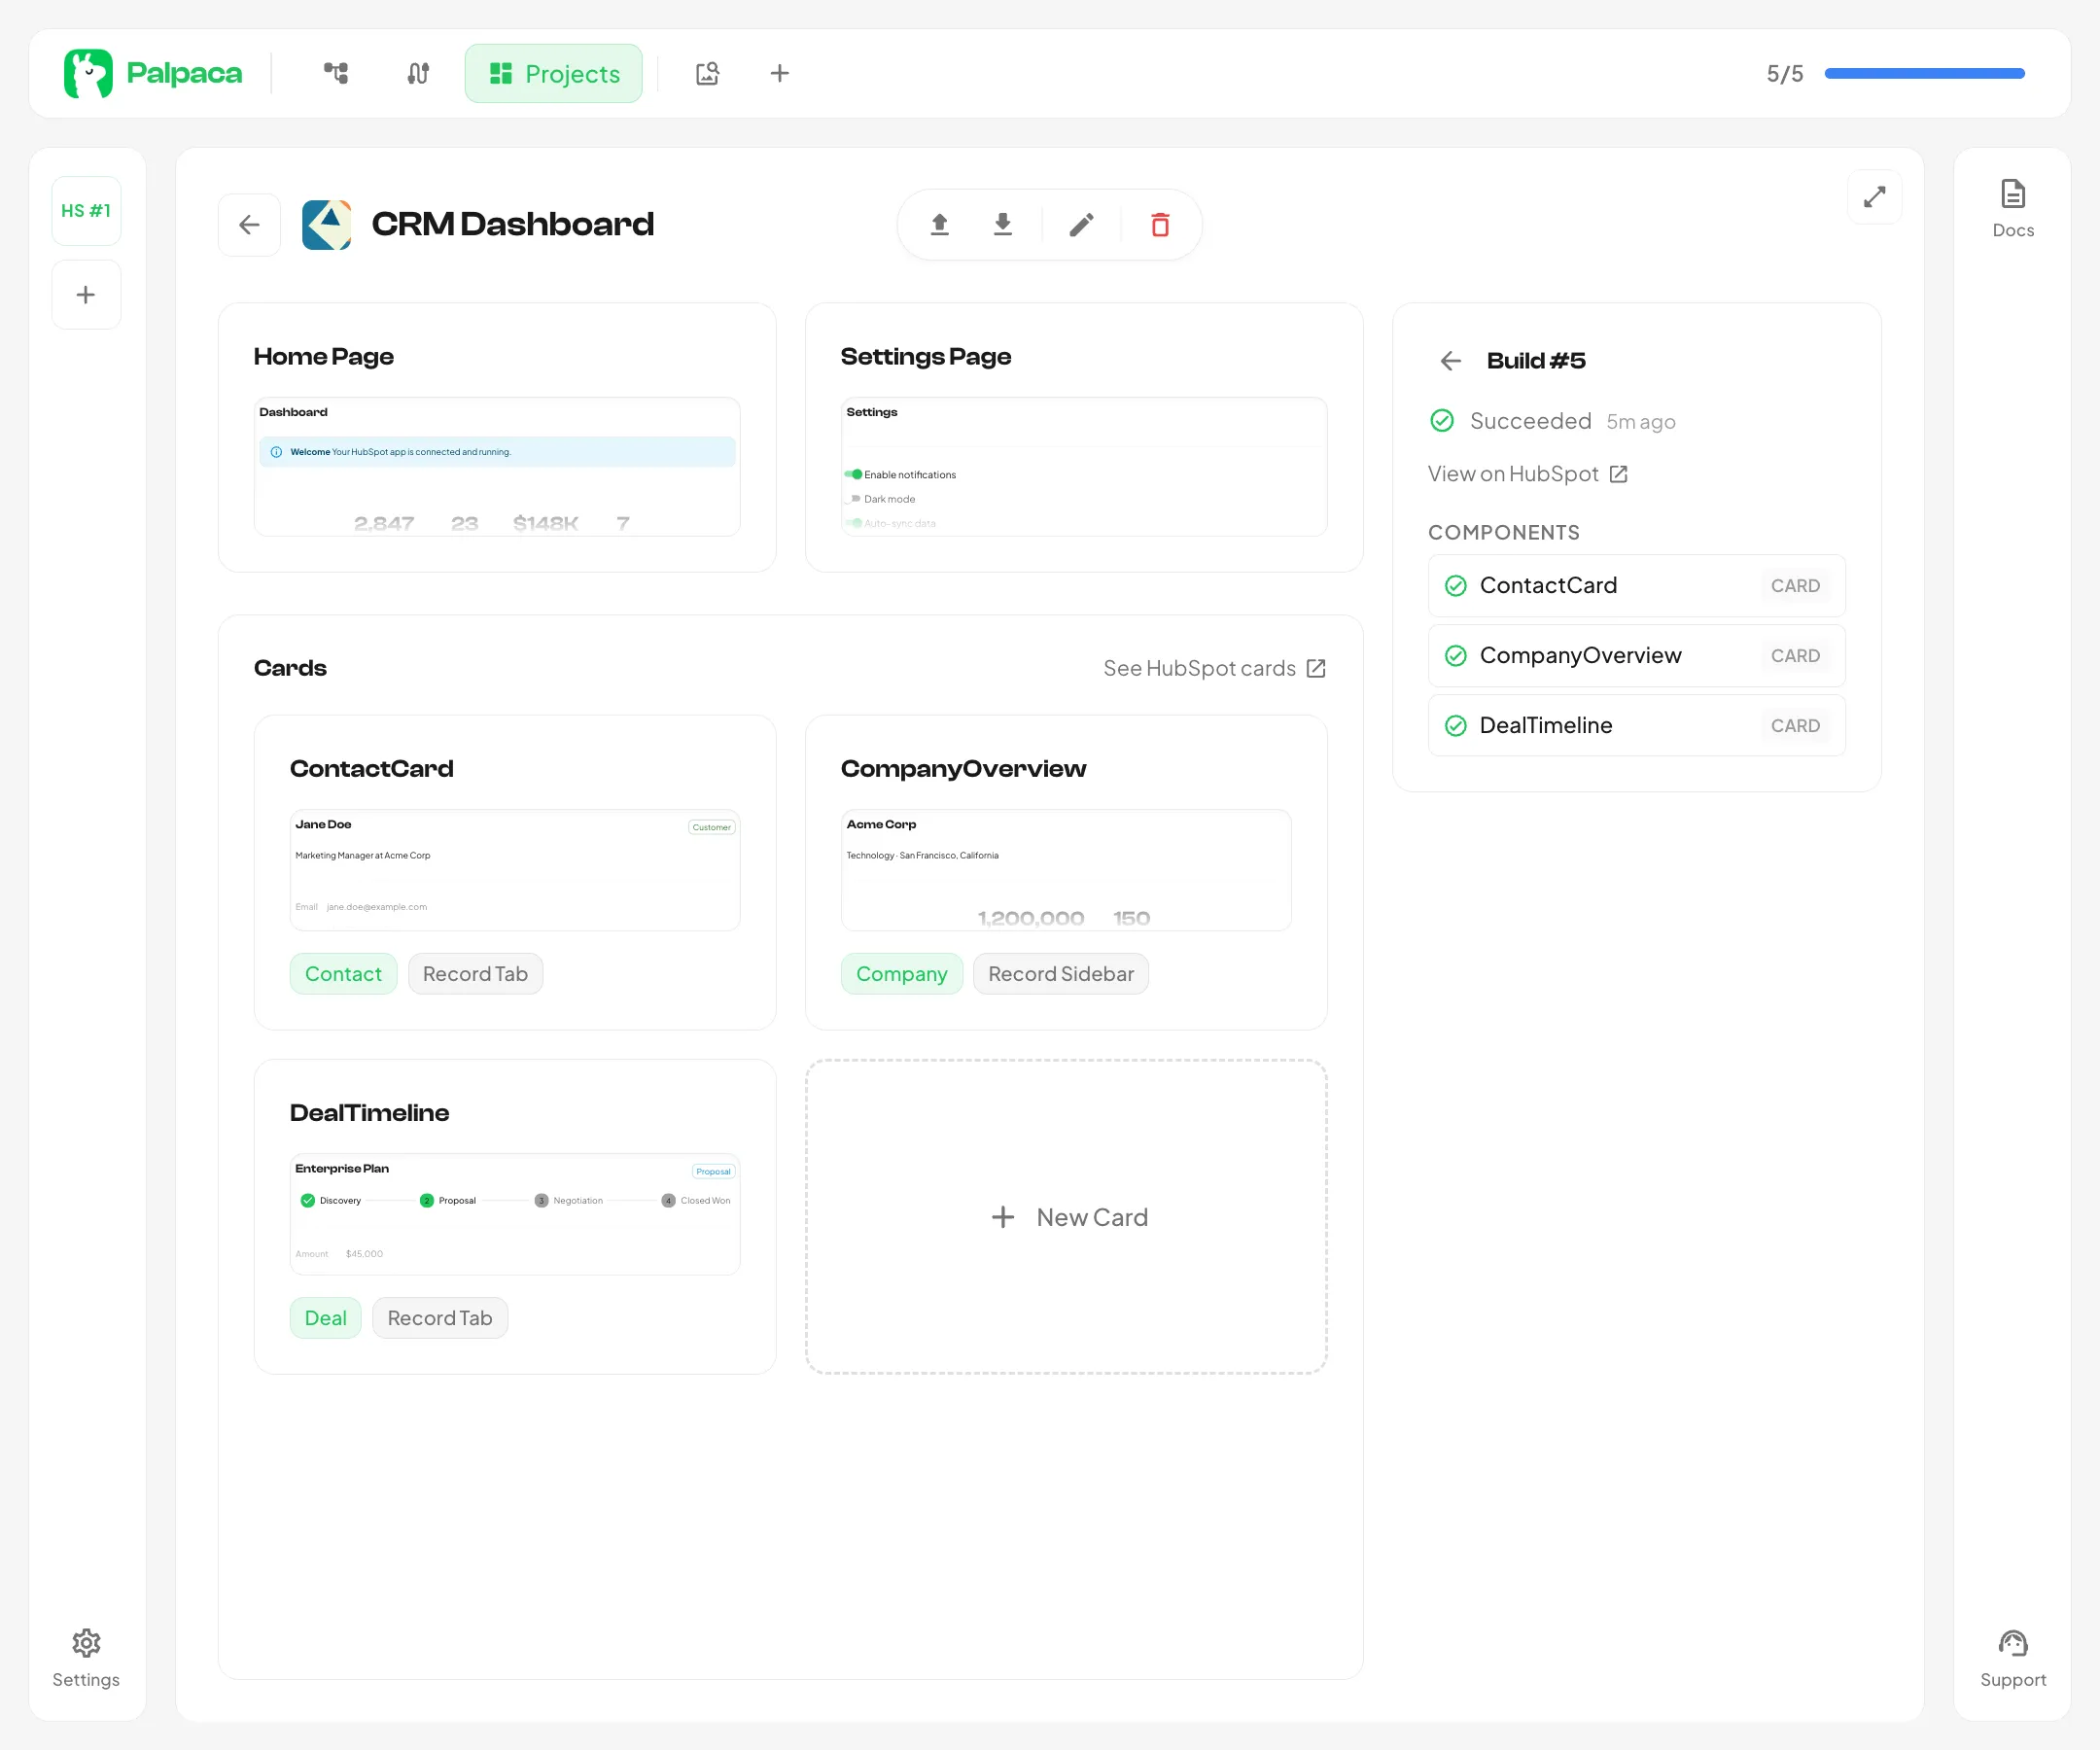
When a build succeeds, the detail view shows:
- Succeeded status with a green indicator
- View on HubSpot — a link to the build in your HubSpot developer account
- Components — a list of every component included in the build, each with a green check and its type badge (Card, Page, etc.)
A successful build means all components compiled without errors and were uploaded to HubSpot.
Failed Builds
Section titled “Failed Builds”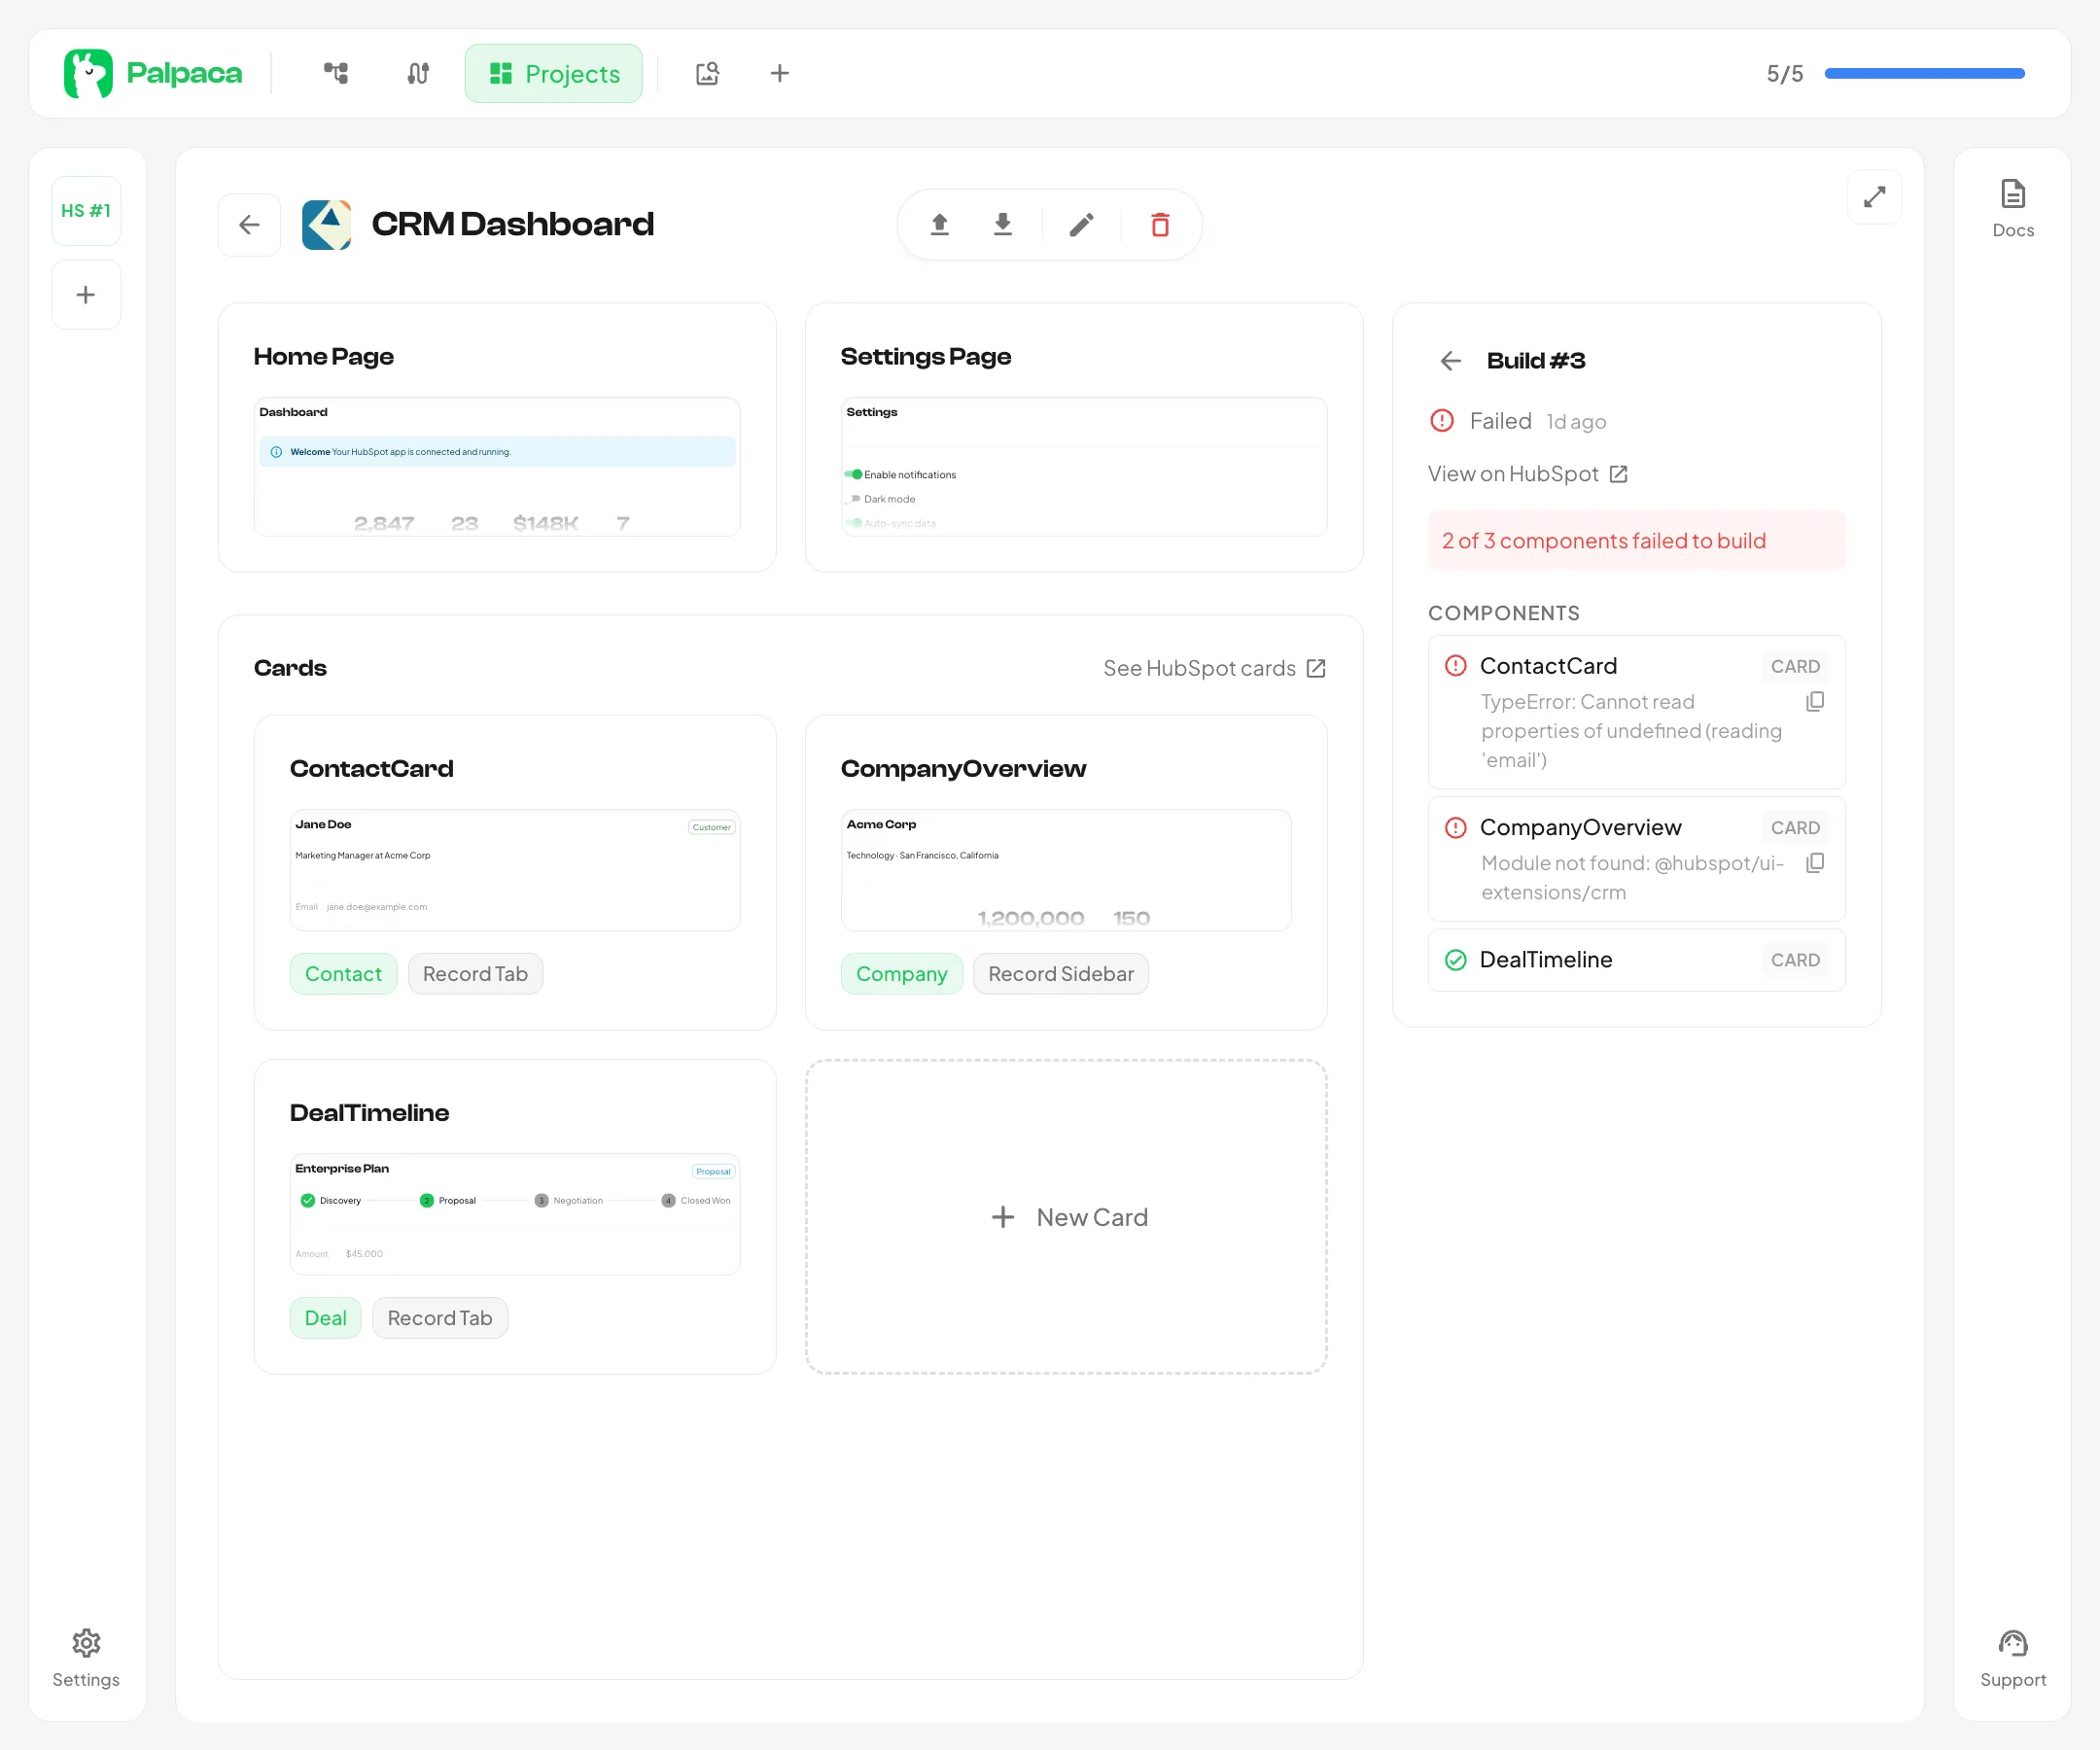
When a build fails, the detail view shows:
- Failed status with a red indicator
- Error summary — a brief description of the failure (e.g., “2 of 3 components failed to build”)
- Components — each component listed with its individual status. Failed components show their error message, which you can copy to clipboard using the copy button
Common causes of build failures include:
- Type errors — TypeScript issues in the generated code
- Module not found — referencing an SDK import that does not exist
- Runtime errors — issues with property access or data handling
Fixing a Failed Build
Section titled “Fixing a Failed Build”If a build fails, open the component that errored in the editor and describe the issue to the AI agent. You can copy the error message from the build detail and paste it into the chat. The agent will read the current code, understand the error, and generate a fix.
After the agent updates the code, upload the project again to create a new build.